I just want to share something I did, that I think may be helpful to others....like life sharing experience. I really happy that my blog posts are being shared and benefit more people.
However, at the same time, I still want to protect my photos. That's why I started adding a watermark in most of my photos.
Recently, I started thinking and trying to create my very own watermark that is going to use on all my photos, in this way, it feels like more professional and consistent in everything I work on.
The is my very own watermark!

Next question: Which Photo Editing Software should I use? Do I need to purchase a license to use it?
Then I re-think about what the design I want on my very own watermark, the answer is 'simple design with my blog's name - AuRa Treasury', that's it! And I don't want to invest in sophisticated photo editing software at this time until I am sure I am going to use a lot.
Then I started searching internet and there are lots of online tools and website that provide watermark function with small fees or even free of charge, here is how it works: upload photos and it provide you with different watermark design option such as font size, color, positioning, etc.
However, I prefer fully control on my photos and my watermark, I use Microsoft PowerPoint to create it.
Here is the video showing all the steps.
Here are the steps:
1) Open a new blank project in Microsoft PowerPoint.

2) Remove the existing templates.


3) Insert a photo in it. Any photo would work.

4) Align the photo in the centre. There should be a red horizontal and vertical line help you to align the photo.
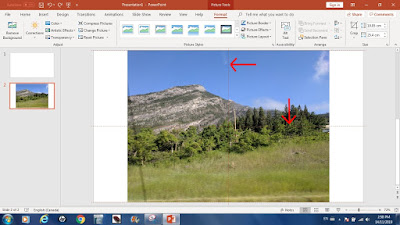
5) Use 'WordArt' to design your watermark.
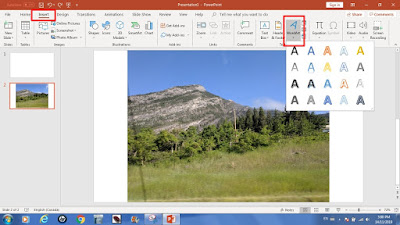
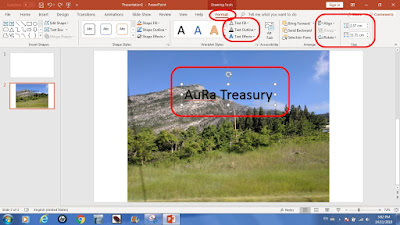
6) Here is my watermark design. The photo that I inserted before helps me to position my watermark design, and show how the watermark looks like on the photo.
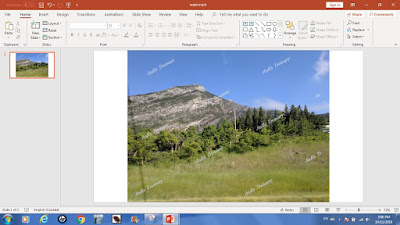
7) When you satisfied with your watermark, you don't need the photo anymore. Remove the photo.
8) My watermark has more than one 'WordArt', so I have to group them.
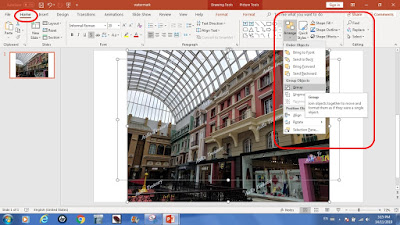
Select them all 'ctrl A' => Arrange => Group


9) Insert a photo.

10) Move the photo to the back so the watermark should be in the front.
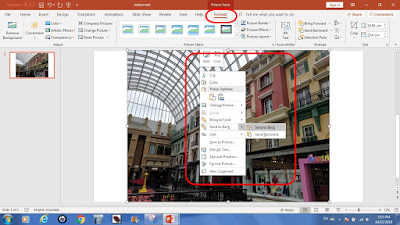

11) Again, group the photo and watermark. Select them all 'ctrl A' => Arrange => Group
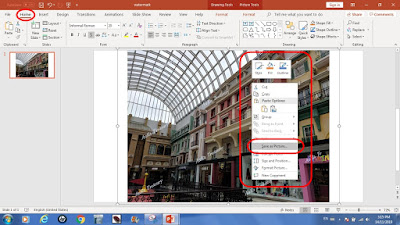
12) Now, save the photo with watermark.
cursor point at the photo, right click => save as Picture
13) Open the picture (I use Windows Photo Viewer) to see how it looks like.

14) Final and very important step: SAVE YOUR POWERPOINT FILE!!!
When you want to put the watermark on your photos anytime, simply open the powerpoint file and follow the above steps, that's it!
In my way, I am really satisfy with it because I don't need to upload my photos to the third party and I can fully control and design what I want in my watermark.
Here are some advise that I would like to share:
1) Trying with free software first before investing in photo-editing software like Adobe Photoshop.
2) Adding watermark can't guarantee your photo is not being used or stole by others, but at least it adds a layer of security as your own. Also, it prevents some lazy image thieves from stealing.

No comments:
Post a Comment